Windswept Tree Sketching: Mastering Nature’s Dynamic Silhouette
Embrace the Drama of Windswept Trees in Your Art
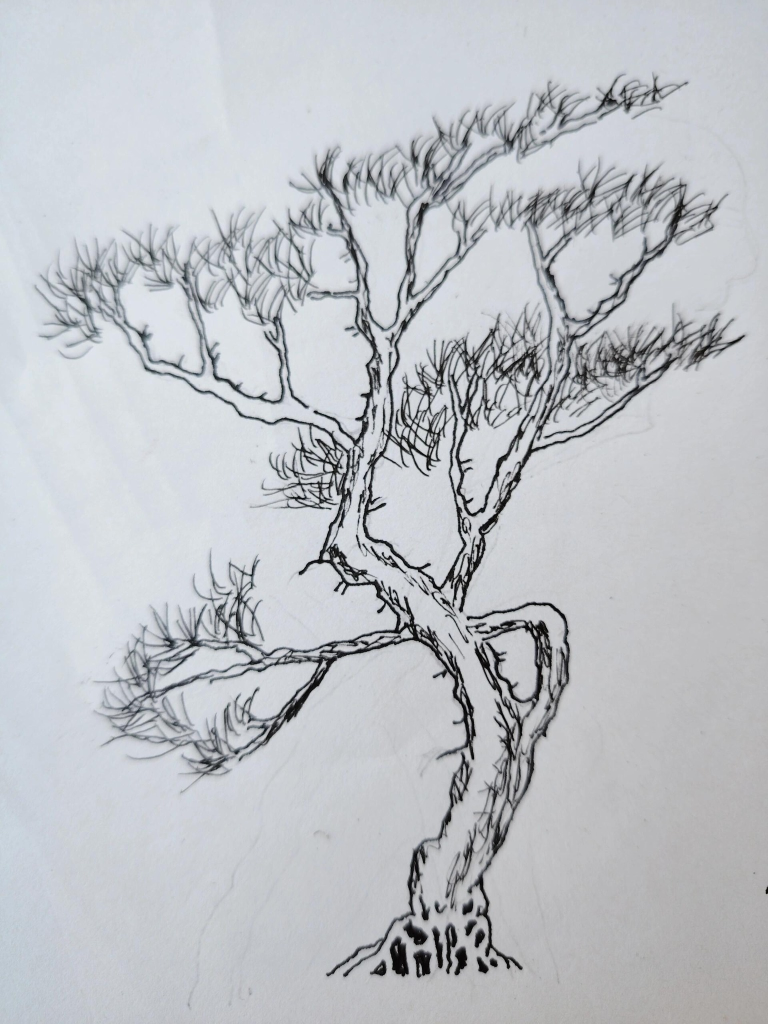
Have you ever been mesmerized by a solitary tree bent by relentless coastal gales or mountain storms? That dramatic silhouette of a windswept tree, gracefully yielding to powerful natural forces, captivates the eye and stirs the soul. In the sketch above, each branch arcs as though bowing to invisible gusts, while tufts of foliage cling defiantly to rugged limbs. This isn’t just a pretty picture—it’s a study in movement, resilience, and the raw beauty of the natural world. Let’s explore how you can recreate this sense of dynamic energy in your own drawings through observation, technique, and thoughtful composition.
Observing Nature: Finding Your Windswept Inspiration
Before pencil meets paper, immerse yourself in real-world models:
- Coastal Promenades: Head to seashores after stormy weather, where salt-sprayed pines lean away from crashing surf.
- Mountain Trails: Notice how high-altitude winds carve gnarled shapes into alpine bristlecones and junipers.
- Storm-Scoured Meadows: Even inland, strong seasonal winds produce wind-pruned saplings with unique profiles.
- Photographic References: Build a digital library of windswept trees—varying in species, angles, and light conditions—to study at your desk.
As you observe, look for the telltale cues of wind direction, branch density, and root exposure that will inform your sketch’s authenticity.
Essential Tools for Expressive Tree Sketches
Choosing the right materials amplifies your ability to convey texture and motion:
- Graphite Pencils (2H–6B): Hard pencils capture fine bark cracks; softer leads build rich shadows in recessed areas.
- Fine-Tip Ink Pens (0.1–0.5mm): For definitive contour lines and detailed needle clusters, ink adds crisp contrast.
- Kneaded Eraser: Perfect for lifting highlights and subtly shaping bark textures without harsh edges.
- Textured Sketch Paper: A slight tooth holds graphite and ink, allowing for layered strokes and tonal variation.
- Ruler or Straightedge: Useful for establishing the horizon line and main trunk angle—your “wind axis”—before freehanding details.
With these tools in hand, you’re ready to channel the elements onto your page.

Mapping the Composition: Dynamic Lines and Focal Points
A compelling windswept tree sketch begins with strong compositional planning:
- Define the Wind Axis: Draw a light diagonal line to represent wind direction—trunk and branches will lean along this vector.
- Establish the Trunk’s Flow: Sketch a bold, slightly curved line for the main trunk, tapering as it rises. This “spine” anchors your piece.
- Balance Branch Placement: Place primary limbs on the downwind side in descending hierarchy—longest lowest, shorter upward—creating rhythmic spacing.
- Create Negative Space: Leave swaths of white paper around branches to suggest open sky and heighten the tree’s solitary drama.
- Choose a Secondary Element: A rugged rock, exposed roots, or a distant cliff can ground your tree and hint at its environment.
By plotting these elements early, you craft a sketch that feels both natural and intentional.
Capturing Texture and Detail: Bark, Needles, and Roots
Conveying the tactile reality of a windswept tree requires careful mark-making:
- Bark Patterns: Use short, angular strokes to depict deep fissures and ridges. Vary pressure to suggest weathered patches and knotted scars.
- Needle Clusters or Leaves: Group foliage into cloud-like clumps, adding individual needle marks along the perimeters for realism. Remember that windward clusters appear sparser.
- Exposed Roots: Sketch sinuous, gnarled roots gripping rocky soil. Emphasize thick roots with heavier lines, while thinner, fibrous offshoots get finer strokes.
- Light and Shadow: Decide on a single light source—shade the windward (leaning) side more heavily, as it would endure more bark wear and splintering.
Through layered textures, your windswept tree will feel alive with centuries of elemental shaping.
Step-by-Step: From Rough Sketch to Refined Artwork
Follow these stages to bring your vision to fruition:
- Rough Outline: Lightly block in trunk lean, major branches, and root flare—focus on flow over detail.
- Secondary Branches: Add smaller limbs and offshoots, maintaining the directional push of the wind axis.
- Contour Inking: If using ink, trace your refined pencil lines with a fine-tip pen, adjusting curves for elegance.
- Texture Layers: Build bark and foliage textures with cross-hatching, stippling, or directional pencil strokes.
- Eraser Highlights: Lift graphite in key areas—rim lighting on bent branches or root bulges—to create depth.
- Final Adjustments: Step back, spot any imbalance, and tweak line weight or erase stray marks for a polished finish.
Patience and iteration ensure each sketch captures the living story of wind and wood.
Infusing Emotion: What a Windswept Tree Can Symbolize
Beyond aesthetics, windswept trees convey powerful metaphors:
- Endurance: Their bent trunks represent resilience—surviving storms season after season.
- Solitude: Often standing alone on ridgelines, they evoke quiet dignity and introspection.
- Adaptation: The graceful yield of branches speaks to flexibility in the face of adversity.
- Time’s Passage: Each scar and twist hints at the years endured, making the tree a living chronicle.
Consider the narrative you wish to express, and let these themes guide your artistic choices.
Conclusion: Let the Wind Guide Your Hand
Sketching a windswept tree is more than rendering a bent trunk—it’s capturing the invisible dance of air and earth, time and tenacity. By observing real-world examples, selecting the right tools, planning your composition, and layering textures, you transform simple lines into a testament of nature’s unyielding spirit. Next time you feel a breeze rustle through your hair, imagine the force sculpting distant trees—and take up your pencil to let the wind guide your art.